Wednesday, December 14, 2011

Chicken and Biscuits with Gravy

For some reason I was craving this yesterday, so I had to try to make it today.  I've never made chicken and biscuits before, so I just winged it, and it turned out pretty yummy.  Is it bad that I slathered so much chicken and gravy on that it completely covered the biscuit in my photo?  Nah.  It was so good.

Chicken and Biscuits with Gravy


Ingredients:
  • olive oil
  • 1 package (8 oz.) crimini mushrooms, sliced
  • Tastefully Simple Seasoned Salt
  • 1 pound chicken breasts, thinly sliced into bite-size pieces
  • Tastefully Simple Garlic Garlic
  • large pinch of thyme
  • 2 cups chicken broth
  • 1 cup nonfat milk
  • a couple heaping tablespoons of whole wheat flour
  • 100% whole wheat biscuits
Directions
  • Heat a tablespoon of olive oil in a skillet and saute the mushrooms with some TSSS.  When they soften, add the chicken breast pieces, TSGG and thyme.  Saute until the chicken is no longer pink, then add the chicken broth.
  • In a small cup or bowl, whisk together the milk and whole wheat flour until smooth.  Add to the chicken skillet and bring to a boil, stirring often.  Reduce heat to low and simmer for about 10 minutes.  The gravy will thicken.  If you want it thicker, whisk a little more flour into a little more milk and add to the skillet.
  • Serve hot over some 100% whole wheat biscuits.

Sunday, December 11, 2011

Crispy Anise Cookies

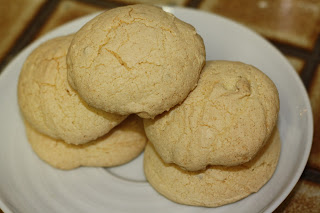
I love biscotti, how they're light, crispy and crunchy, how they're not too sweet, and how they're perfectly dunkable in a mug of hot coffee.  But oh how I hate the time and effort (and mess!) it takes to bake them twice (because, you see, biscotti = twice baked).  So I decided to try my basic biscotti recipe as a drop cookie.  Genius, isn't it?  Ok, maybe not genius, but it is delicious and oh-so-dunkable.

My basic recipe uses just anise for flavoring, but you could easily mix it up with all sorts of add-ins.  How about chocolate chip almond cookies (replace anise extract and seeds with almond extract and mix in 1 cup of toasted blanched almond slivers and 1 cup of semi-sweet chocolate chips)?  Or cranberry orange cookies (replace anise extract and seeds with vanilla extract and mix in 2 tablespoons orange zest and 1.5 cups of dried cranberries)?  Or peppermint cookies (replace anise extract and seeds with peppermint extract and mix in 1 cup of crushed candy canes)?  I'm drooling already.

Crispy Anise Cookies
Yields approximately 4 dozen.


Ingredients:
  • scant 3.5 cups all purpose flour
  • 2 teaspoons baking powder
  • 1/2 teaspoon salt
  • 4 large eggs
  • 2 cups granulated sugar
  • 2 teaspoons anise extract
  • 2 teaspoons anise seeds
Directions:
  • Pre-heat oven to 350 degrees F.  Line baking sheets with parchment paper.
  • In a mixing bowl, whisk together the flour, baking powder and salt.
  • In another bowl, beat the eggs and sugar on high speed until it becomes light and fluffy, about 5 minutes.  Beat in the anise extract and seeds.
  • Add in half of the dry mixture and mix until incorporated, then add in the rest of the dry mixture and continue to mix until incorporated.
  • Drop by teaspoonfuls onto the parchment-lined baking sheets.  Bake for 20 - 22 minutes until lightly golden.
  • Remove from oven.  Once the cookies are cool enough to touch, transfer them to a wire rack and let cool completely.  Store in an air-tight container.
 Left: cranberry almond cookies (2 teaspoons vanilla extract, 1 cup toasted slivered almonds, 1 cup dried cranberries)

Right: chocolate chip almond cookies (2 teaspoons almond extract, 1 cup toasted slivered almonds, 1 cup semi-sweet chocolate chips)

    Friday, December 2, 2011

    Chicken Stuffed with Black Beans and Cumin

    Earlier this week I was making a batch of Brown Rice and Lentil Soup when I realized how much I love cumin, and how I really don't cook with it enough.  Then I remembered seeing a recipe for Cumin Chicken with Black Bean Stuffing.  It looked delicious, but I wanted something a little simpler, easier and quicker for a weeknight meal.  If you've been following this blog for a while, you'll know that I love stuffed chicken breasts; so easy, so versatile, and it makes plain ol' chicken breasts fun.  So I figured, why not stuff chicken breasts with black beans seasoned with cumin?  Sounds weird, right, to stuff chicken breasts with beans?  But it is SO good!  Don't omit the spritz of lime at the end, it's killer!

    Chicken Stuffed with Black Beans and Cumin


    Ingredients:
    • cooking spray
    • approximately 1.5 teaspoons ground cumin, divided
    • Tastefully Simple Seasoned Salt
    • 4 boneless, skinless chicken breasts, butterflied
    • 1 can (15 oz.) black beans, drained and rinsed
    • Tastefully Simple Onion Onion
    • small lime wedges
    Directions:
    • Pre-heat oven to 350 degrees F.  Spray a baking pan lightly with cooking spray.
    • In a bowl, combine 1 teaspoon of cumin with about a teaspoon of TSSS.  Rub onto the outside of each chicken breast.
    • In a separate bowl, combine the beans, the remaining 1/2 teaspoon of cumin, a few dashes of TSSS and a few dashes of TSOO.  Mash briefly with a fork.  Divide the bean mixture into fourths and stuff into the chicken breasts.
    • Place the stuffed chicken breasts in a single layer in the sprayed baking pan and into the pre-heated oven.  Bake for 20 - 25 minutes until cooked through.
    • Spritz lightly with lime wedges before serving.

    Monday, November 28, 2011

    Roasted Root Vegetables with Fennel

    You can make this with whatever root veggies you like.  Today I used yams and parsnips (SBD phase 3), but it's also delicious with carrots, turnips (SBD phase 3), red or white potatoes (not SBD-legal), and even beets (SBD phase 3).  I've also added butternut squash in the past; even though that's technically not a root veggie, it's still delicious in a roasted medley.

    Roasted Root Vegetables with Fennel


    Ingredients:
    • 1 large yam
    • 1 large parsnip
    • 1 medium fennel bulb
    • a couple tablespoons olive oil
    • Tastefully Simple Seasoned Salt
    • freshly-ground black pepper
    • a pinch of dried thyme
    Directions:
    • Pre-heat oven to 375 degrees F.
    • Peel and cut the yam and parsnip into 1/2" cubes.  Wash the fennel, cut off the frond section, and slice the bulb into 1/2"-thick wedges.  Place the veggies onto a baking sheet, drizzle with a couple tablespoons of olive oil, sprinkle on TSSS and black pepper to taste, and add a pinch of dried thyme.  Toss until evenly coated.
    • Roast in the pre-heated oven for 45 - 60 minutes, until the veggies are soft.

    Monday, November 14, 2011

    Creamy Chicken and Mushrooms

    Today was bright and sunny, beautiful, really.  But for some reason I was in the mood for comfort food.  I had some chicken tenders and mushrooms in the fridge, so here's what I did with it:

    Creamy Chicken and Mushrooms


    Ingredients:
    • 2 pounds of chicken tenders or boneless, skinless chicken breasts
    • a couple tablespoons of olive oil
    • Tastefully Simple Seasoned Salt
    • Tastefully Simple Onion Onion
    • Tastefully Simple Garlic Garlic
    • 1 pound small whole crimini mushrooms
    • 1 cup chicken broth
    • 1 can (12 oz.) evaporated skim milk
    • 2 heaping tablespoons of whole wheat flour
    • 1/2 cup frozen peas
    Directions:
    • Cut the chicken into bite-size pieces.   In a large skillet, brown the chicken in a little bit of olive oil, some TSSS, TSOO and TSGG.  Add in the mushrooms and stir for a minute.  Add in the chicken broth and bring to a boil, scraping up all the brown bits.  Reduce heat and simmer for 10 minutes (stirring occasionally) until the chicken is cooked through and the mushrooms soften.
    • In a separate bowl or cup, whisk the flour into the evaporated skim milk until smooth.  Add to the chicken skillet.  Bring to a boil, then reduce to simmer.  Add in the peas and simmer for 5 minutes.  Check seasoning and add more TSSS if necessary.
    • Serve over brown rice.

    Monday, October 24, 2011

    Roasted Rosemary Chicken with Veggies

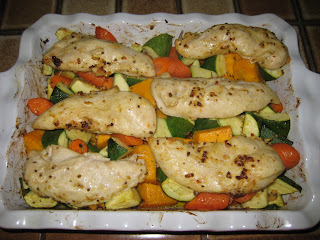
    I love butternut squash, and it's so plentiful and sweet this time of year.  Here's a great recipe that uses butternut squash, not as the main ingredient, but mixed in a scrumptious medley.  Two thumbs up.

    Roasted Rosemary Chicken with Veggies
    Adapted from this recipe.


    Ingredients:
    • 1 butternut squash, peeled, seeded and cubed
    • 3 carrots, cubed
    • 4 zucchini, cubed
    • 3 tablespoons olive oil, divided
    • 3 tablespoons Dijon mustard, divided
    • 3 teaspoons rosemary, divided
    • Tastefully Simple Seasoned Salt
    • freshly-ground black pepper
    • 4 boneless, skinless chicken breasts or 8 chicken tenders
    Directions:
    • Pre-heat oven to 400 degrees, F.
    • In a large mixing bowl, toss the butternut squash and carrots with 1 tablespoons olive oil, 1 tablespoons mustard, 1 teaspoon rosemary and TSSS and black pepper to taste.  Pour into a large baking dish and bake in pre-heated oven for 20 minutes.  
    • Meanwhile, add the zucchini to the mixing bowl along with 1 more tablespoon each of olive oil and mustard, 1 teaspoon rosemary, and some more TSSS and black pepper and toss.  Set aside.
    • In a separate mixing bowl, combine chicken with the remaining 1 tablespoon olive oil, 1 tablespoon mustard, 1 teaspoon rosemary, and TSSS and black pepper to taste.  Set aside.
    • Once the butternut squash and carrots have roasted for about 20 minutes, they should be semi-soft.  Remove baking dish from the oven, add the zucchini and toss.  Lay the chicken pieces on top of the veggies.
    • Return the baking dish to the oven and continue roasting for another 25 (tenders) - 35 (breasts) minutes until the chicken is cooked through.  Remove from oven and let sit for a few minutes before serving.

    Thursday, October 20, 2011

    Spinach Stuffed Salmon

    Another quick fish idea.  Easy enough for a Thursday night, fancy enough for a dinner party.  Eat more fish!

    Spinach Stuffed Salmon


    Ingredients:
    • 4 6-ounce wild salmon center-cut filets (about 1.5 pounds total)
    • 2 cups frozen spinach, thawed and squeezed dry (it squeezes down to about 1 cup)
    • 1/2 cup shredded parmesan
    • 1/4 cup pine nuts or chopped walnuts
    • Tastefully Simple Seasoned Salt
    • olive oil in a mister
    • lemon wedges
    Directions:
    • Pre-heat oven to 375 degrees F.
    • Cut a hole, width-wise, into each salmon filet, leaving a 1/3-inch boarder around 3 sides, forming a pocket.  Set aside.
    • In a bowl, mix together the thawed spinach with the parmesan, pine nuts and a couple shakes of TSSS.
    • Divide the spinach mixture into 4 equal parts and stuff into each of the prepared salmon filets.
    • Spray a baking sheet with olive oil.  Place the stuffed salmon filets on the sheet, then spray the tops of each filet with more olive oil.  Sprinkle with TSSS.
    • Bake for 12 - 15 minutes until cooked through.  Squirt with lemon wedges before serving.

    Monday, October 17, 2011

    Honey Dijon Salmon

    Salmon is so quick and versatile.  I was late starting dinner today, so I threw this together in under 30 minutes.

    Honey Dijon Salmon


    Ingredients:
    • 1.5 pound salmon filet, skin on
    • Tastefully Simple Seasoned Salt
    • equal parts whole grain Dijon mustard and honey
    Directions:
    • Pre-heat oven to 375 degrees F.
    • Place the salmon filet, skin side down, onto a baking sheet.  Sprinkle with TSSS.
    • In a small bowl, mix together about 2 tablespoons each of mustard and honey.  Spread it on top of the salmon.
    • Bake for 20 minutes until cooked through.

    Sunday, October 2, 2011

    Baked Spaghetti Squash

    This is very similar to a baked pasta, except with spaghetti squash in place of the pasta.  Not only is this loaded with veggies, it's scrumptious as well.

    You can add whatever you want to it, including, but not limited to, mushrooms, spinach, zucchinis, and bell peppers.  You can also replace the ground turkey with sausage for a flavorful kick.

    Baked Spaghetti Squash


    Ingredients:
    • 1 medium spaghetti squash
    • 1 tablespoon olive oil
    • 1 pound ground turkey
    • salt and pepper
    • 2 cloves garlic, minced
    • 1 jar marinara sauce
    • 1 16-ounce tub (2 cups) of reduced-fat ricotta cheese
    • 1 cup of shredded part-skim mozzarella cheese, divided
    • 1/4 cup of shredded Parmesan cheese
    • small handful of fresh basil leaves
    Directions:
    • Using a sharp chef's knife, carefully cut several small slits around the outside of the spaghetti squash.  Place the whole squash into a large microwave-proof bowl with a couple tablespoons of water.  Microwave on high for 5 minutes.  Remove and carefully flip the squash over.  If your microwave does not have a turntable, you'll want to rotate it 180 degrees as well.  Microwave on high for another 3 - 5 minutes until the squash is soft but not mushy.  The skin should give a little when you push lightly but firmly on it.  Set the squash aside for 30 minutes to let it cool.
    • Pre-heat oven to 350 degrees F.
    • In a large saute pan over medium-high heat, brown the ground turkey in a tablespoon of olive oil.  Season with salt and pepper to taste.  Add the garlic and stir for a minute.  Drain the fat and set the meat aside.
    • Once the spaghetti squash is cool enough to handle, cut it in half length-wise with a sharp knife.  Scoop the seeds out with a spoon and discard.  Then, using a fork, scoop out the squash strands directly into the saute pan with the browned meat.  Discard the squash shell.
    • Add an entire jar of prepared marinara sauce to the meat and squash mixture.  Add salt and pepper to taste.  Stir to combine.
    • Spoon half of the squash mixture into the bottom of a baking dish.  Layer all the ricotta cheese over it.  Then sprinkle on 3/4 of the shredded mozzarella cheese.  Pour the remainder of the squash mixture into the dish.
    • Bake in the pre-heated oven for 30 minutes until bubbly.  In the last minute, sprinkle the remaining mozzarella and the Parmesan on top and return to the oven so the cheese can melt.
    • Remove from oven and let sit for 5 minutes before serving.  Top with a chiffonade of basil leaves.

    Thursday, September 29, 2011

    100% Whole Wheat Biscuits

    Most whole wheat biscuit recipes call for part whole wheat flour and part all-purpose flour.  I made mine with 100% whole wheat flour.  I have written the basic biscuit recipe below.  At the bottom, I've included a couple of variations.  The picture below is of cheddar dill biscuits.

    100% Whole Wheat Biscuits
    Adapted from this recipe.
    Yields 12 small biscuits


    Ingredients:
    • 2 cups whole wheat flour
    • 1 1/2 tablespoons baking powder
    • 1 tablespoon honey
    • 1/2 teaspoon salt
    • 1/4 cup Smart Balance, cold
    • 1 cup skim milk, cold
    • additional whole wheat flour for rolling
    Directions:
    • Pre-heat oven to 450 degrees F.
    • In a food processor, pulse together the first five ingredients.  When the flour has a consistent coarse texture, dump it out into a mixing bowl.
    • Add the cold milk to the flour mixture and stir gently with a wooden spoon until everything is just evenly incorporated.  The dough will be very sticky.
    • Sprinkle some whole wheat flour onto a clean, smooth work surface.  Turn the sticky dough out onto the flour and form into a large ball.  (Flour your hands to minimize dough stickage.)  You can then roll the dough out to 3/4-inch thickness and cut with a 2 1/2 inch diameter biscuit cutter, or you can pinch off pieces of dough and roll them into 2-inch balls and then slightly flatten them out.  Handle the dough as little as possible to maximize biscuit softness and fluffiness.
    • Place the biscuits 2 inches apart on an ungreased baking sheet and bake in the pre-heated oven for 10 minutes.
    For garlicky biscuits, add 2 teaspoons garlic powder to the dry ingredients.

    For cheddar dill biscuits (as pictured above), add 1.5 teaspoons of dried dill to the dry ingredients.  Then add 1 cup shredded reduced-fat sharp cheddar cheese when you add the milk.

    Tuesday, September 27, 2011

    Veggie Strata

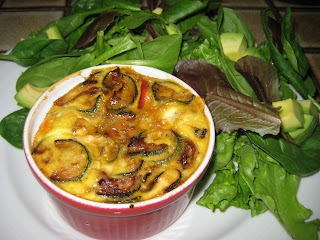
    Stratas are great for the end of the month when you need to stretch that grocery budget because they use inexpensive ingredients that you probably have left over in the fridge anyway.  The base of a strata is bread, eggs and milk.  What you add to that is up to you.  Below is a basic veggie strata recipe using leftover veggies from my fridge today.

    I like to make these in 8-ounce ramekins because they're pretty, and it's built-in portion control.  You can also make this recipe in an 8"x8" square baking pan.

    Veggie Strata


    Ingredients:
    • Smart Balance
    • 4 slices of 100% whole wheat bread
    • 8 large eggs
    • 3/4 cup nonfat milk
    • salt & pepper
    • 1 tablespoon olive oil
    • 1/2 medium onion, sliced
    • 1/2 medium red bell pepper, sliced
    • 2 medium zucchini, thinly sliced into half-moons
    • 1 clove of garlic, minced
    • 4 tablespoons of shredded part-skim mozzarella cheese
    • 4 tablespoons of shredded Parmesan cheese
    Directions:
    • Pre-heat oven to 350 degrees F.
    • Grease 4 8-ounce ramekins with Smart Balance.  Using a round cookie or biscuit cutter the same diameter as your ramekins, cut out 4 circles from the 4 bread slices.  (Put the bread scraps into a plastic bag and throw into the freezer to use later as croutons or bread crumbs.) Place one bread circle at the bottom of each greased ramekin.  Set aside.
    • In a mixing bowl, whisk the eggs, milk, and salt and pepper to taste (I used approximately 1/4 teaspoon each of salt and pepper).  Pour some egg mixture into each ramekin, just enough to cover the bread.  Set everything aside.
    • In a sauté pan, heat olive oil on medium heat.  Add onion slices and sauté until soft, about 7 minutes.  Then add the rest of the veggies, garlic and salt and pepper to taste, and continue to sauté until everything is soft.  Set aside.
    • By this point, the egg mixture that was poured into the ramekins should have all been soaked up by the bread slices.
    • Top each soaked bread slice with 1 tablespoon of mozzarella and 1 tablespoon of Parmesan.  Add the sauteed veggie mixture, dividing it evenly among the 4 ramekins.  Then pour the remaining egg mixture evenly into each ramekin.
    • Place the ramekins onto a baking sheet (this step is important, since the stratas will puff up while baking, and possibly bubble over, making a mess in your oven if you don't use the baking sheet).  
    • Bake in the center rack of the pre-heated oven for 30 minutes.  (If you are making one big strata as opposed to 4 ramekins, increase the baking time to 40 - 45 minutes.  The strata should be completely set and not jiggle when it's fully cooked.)
    • The stratas will puff up while baking, but after they're removed from the oven, they will quickly deflate.  Let sit for 5 minutes before serving.
    You can serve these right from the ramekins, or you can take them out.  They should pop out of the ramekins very easily.

    Thursday, September 22, 2011

    Chicken Stuffed with Goat Cheese and Spinach

    I thought I'd posted this already, but it seems I have not.  I used my Goat Cheese and Spinach Stuffed Portabellas recipe and applied it to chicken breasts.  Yummy and versatile.

    Chicken Stuffed with Goat Cheese and Spinach


    Ingredients:
    • 4 medium boneless, skinless chicken breasts
    • salt and pepper
    • 1 log (4 oz.) goat cheese, softened at room temperature
    • 1/4 cup frozen spinach, thawed and squeezed of excess water
    • cooking spray
    Directions:
    • Pre-heat oven to 350 degrees F.
    • Butterfly the chicken breasts.  Season outsides and insides with salt and pepper.
    • In a bowl, combine the goat cheese and spinach. Divide the mixture into 4 equal parts and stuff inside the butterflied chicken breasts.
    • Place the stuffed breasts onto a baking sheet sprayed with cooking spray.  Bake in pre-heated oven for 20 minutes until chicken is cooked through.

    Wednesday, September 21, 2011

    Stuffed Eggplant

    This is soooo good.  The stuffing is killer.  Thanks, Michael's Mom!  I'm thinking the stuffing would be good in giant portobellos, or even bell peppers, too.

    I would highly recommend baking the empty eggplant "shells" for a little bit before adding the stuffing, and then continuing to bake once they're stuffed.  The first time I made this following the original recipe, I stuffed the raw eggplant "shells" and they were not quite cooked through when the stuffing was done.  Also, I mixed the chopped tomatoes directly into the meat mixture instead of piling them on top.  YUM!


    Stuffed Eggplant
    Taken from this recipe.


    Ingredients:
    • 2 smallish (5" - 6") eggplants
    • 1 tablespoon olive oil
    • 1 small onion, diced
    • 1/2 pound ground sirloin
    • salt and freshly-ground black pepper
    • 3 cloves garlic, minced
    • 1 small red pepper, diced
    • 1 large heirloom tomato, chopped
    • 1/2 cup fresh basil leaves, chopped
    • 1 cup grated Parmesan cheese
    • 1/4 cup bread crumbs
    • 1 egg
    • 2 additional tablespoons of grated Parmesan cheese
    Directions:
    • Pre-heat oven to 350 degrees F.
    • Remove the eggplant tops and cut each eggplant in half, lengthwise.  Scoop out some of the inside center flesh, leaving a 1/4" shell.  Place the shells, skin side down, on a baking sheet misted with olive oil and bake for 15 minutes, then remove from the oven and set aside.  In the meantime, place the scooped out flesh in a microwave-safe bowl with a couple tablespoons of water and microwave on high for 2 minutes until soft.
    • In a sauté pan, heat the olive oil over medium heat and sweat the onion until translucent.  Add the ground sirloin, salt and pepper to taste, and minced garlic.  Brown the beef, then drain the fat and transfer the beef to a mixing bowl.
    • Add the microwaved eggplant flesh and the rest of the ingredients (except for the two additional tablespoons of Parmesan) to the bowl and combine with the meat.
    • Divide the meat mixture into 4 equal parts and spoon into each of the partly-baked eggplant "shells".
    • Place the stuffed eggplants back into the oven and bake for another 45 minutes.
    • When done, sprinkle the tops with the remaining Parmesan cheese and place back into the oven for a minute until the cheese melts.

    Sunday, September 18, 2011

    Saucy Pork Chops

    We spent the day apple picking in Oak Glen.  It was a lot of fun for the toddler.  I was highly disappointed this year, though.  The crops were sparse, and 90% of the apples were infested with worms.  Even the farm folks admitted that the number of damaged apples was higher than usual.  It took us almost 2 hours to find enough non-wormed apples to fill our 2 small bags.  Hopefully next year will be better.

    By the time we got home, it was after 6pm and we were STARVING.  I had some pork chops and a package of crimini mushrooms in the fridge.  I wanted something substantial and comforting, so I thought I'd experiment with some sort of gravy for the chops, to be served over brown rice that would sop up all the saucy goodness.  It was so good.

    Saucy Pork Chops


    Ingredients:
    • 2 tablespoons olive oil
    • 4 medium boneless pork chops (1.5 - 2 pounds), all visible fat removed
    • salt and pepper
    • 1 medium onion, sliced
    • 1 8oz. package of crimini mushrooms, roughly chopped
    • 2 cloves garlic, minced
    • 2 tablespoons whole wheat flour
    • 2 cups chicken broth
    Directions:
    • Heat olive oil in a heavy skillet.  Season the pork chops on both sides with salt and pepper.  Sear the chops for a few minutes on each side.  Transfer the chops to a plate and set aside.
    • Add the sliced onion and chopped mushrooms to the skillet and stir, scraping up all the brown bits.  Sauté for 5 - 7 minutes on medium heat until the onions and mushrooms are soft.  Add the minced garlic and stir for another minute.
    • Sprinkle the mixture with whole wheat flour and continue to stir for another minute.  Add in the chicken broth. Bring to a boil, then reduce heat to medium-low.  
    • Transfer the seared pork chops back to the skillet and nestle them into the sauce.  Cover and simmer on medium-low for 10 minutes, until the chops are cooked through.  Check the flavor of the sauce and add salt and pepper if necessary.
    • Serve over brown rice or whole wheat noodles.

    Monday, August 29, 2011

    Spinach and Mushroom Lasagna

    Spinach and Mushroom Lasagna
    Adapted from this recipe


    Ingredients:
    • 9 whole wheat lasagna noodles
    • 1 (15 ounce) container of part-skim ricotta cheese
    • 1 cup fat-free cottage cheese
    • 2 eggs
    • olive oil
    • 1 onion, diced
    • 1 pound sliced crimini mushrooms
    • Tastefully Simple Seasoned Salt
    • 1 (1 pound) bag of frozen chopped spinach, thawed and squeezed of excess water
    • 1 jar marinara sauce
    • 1/2 cup shredded part-skim mozzarella cheese
    • 1/2 cup freshly-grated parmesan cheese
    Directions:
    • Pre-heat oven to 375 degrees F.
    • Boil noodles per package instructions.  Drain and lay flat on aluminum foil, set aside.
    • In a mixing bowl, combine the ricotta and cottage cheeses with the eggs.  Set aside.
    • Heat a couple tablespoons of olive oil in a large skillet.  Sweat the diced onion until translucent.  Add the mushrooms and season with TSSS.  Sauté for several minutes until soft.  Add the spinach and sauté a few minutes longer.  Add the marinara sauce and continue to stir until heated through.  Remove from heat and set aside.
    • Spray the bottom of a lasagna pan with olive oil.  Lay 3 noodles in the pan.  Spread half of the cheese mixture over the noodles.  Then spread half of the spinach-mushroom mixture over the cheese.  
    • Lay down 3 more noodles.  Spread the rest of the cheese mixture (minus 3 tablespoons, which you need to reserve), then the rest of the spinach-mushroom mixture.
    • Lay down the last 3 noodles.  Top with the remaining reserved cheese mixture.
    • Cover with aluminum foil and bake for 45 minutes.  Then remove the foil, top with the shredded mozzarella and parmesan, and return the lasagna to the oven for an additional 15 minutes.
    • When done and bubbling, remove the lasagna from the oven and let sit for 10 minutes before serving.

    Thursday, August 18, 2011

    Palmiers

    I grew up all over the world, but my most memorable experiences came from the 5 years we spent living in Côte d'Ivoire (the Ivory Coast), West Africa.  Côte d'Ivoire used to be a French colony and gained its independence from France on August 7, 1960.  When we lived there in the early-to-mid-80s, there was still a lot of French influence, including many boulangeries and patisseries turning out crusty loaves of French baguettes and flaky desserts.  One of my favorites was the palmier, a light, airy, flaky, sweet, crunchy "cookie".  Its base is a puff-pastry-type dough, which, while simple to make in theory, takes a lot of time, something I don't have much of these days.

    Enter my Google search, which led me to where else but the Food Network website.  The two palmier recipes that stood out to me were from two of my favorite chefs: Ina Garten and Anne Burrell.  They use frozen puff-pastry sheets from the grocery store.  YAY!  Not exactly the same as the authentic stuff, but close enough and pretty damn good.

    What I ended up baking today was a mesh of these two recipes.  Ina's recipe is more traditional, but when I saw that Anne puts cinnamon in hers, I had to try it that way.  Sans orange zest.

    Oh, and if the thought of light, flaky, crispy pastries filled with sweet, crunchy caramelized sugar has you distracted and wondering if this recipe is South Beach Diet approved, sorry, but it's not.

    Palmiers
    Taken from this recipe and this recipe.
    Makes approximately 4 dozen cookies


    Ingredients:
    • 1 cup white sugar
    • 1 tablespoon ground cinnamon (optional)
    • 1 pinch of kosher salt
    • 1 package of Pepperidge Farm frozen puff pastry (2 sheets), thawed
    • 1 bag (12 oz.) semi-sweet chocolate chips (optional)
    Directions:
    • Combine the sugar, cinnamon and salt together in a small bowl.
    • Sprinkle 1/4 cup of the sugar mixture onto a pastry marble.
    • Open up one of the thawed pastry sheets directly onto the sprinkled sugar mixture on the marble.  Sprinkle another 1/4 cup of sugar mixture onto the top of the pastry sheet.  Make sure to coat every bit of the dough with sugar.
    • Using a rolling pin, roll out the dough into a large rectangle, about 1/8-inch thick.  You want to press the sugar mixture into the dough while rolling.
    • Take one of the short ends of the rectangle and fold it so the end reaches halfway to the middle of the rectangle.  Then fold it again so you reach the middle of the rectangle.  Do the same to the other side.  Then fold one side onto the other as if you're closing a book.  (You'll have a 6-layered flat "log".)
    • Transfer the "log" to a baking sheet and refrigerate for 30 minutes.
    • Do the same for the remaining thawed pastry sheet.
    • Pre-heat oven to 400 degrees F.
    • When ready to bake, remove one of the "logs" from the fridge and place onto a clean flat surface like a pastry marble.  Slice it into 1/4-inch pieces (approximately 24 pieces per "log"), and lay each piece flat onto a Silpat-lined baking sheet, about 2 inches apart.
    • Bake for 12 minutes, then flip the cookies and continue baking for an additional 3-6 minutes, depending on your oven.  You want the cookies a nice golden brown.  Check them often towards the end; when I did 5 minutes mine turned out slightly burned, but 3 minutes was perfect.
    • Let cool for 5 minutes on the pan, then once the cookies firm up a bit, transfer them to a wire rack to finish cooling.
    • For optional chocolate dip: Melt chocolate chips in a double boiler over simmering water.  Dip completely cooled cookies in the melted chocolate and lay them on parchment paper to set.
    • Store the cookies in an air-tight container.

    Tuesday, August 9, 2011

    Fish with Eggplant Ragout

    Today was clean-out-the-fridge day.  I found: 1 eggplant, 1 package of sliced button mushrooms, a small orange bell pepper from a friend's garden, and 1/2 an onion.  On the counter were 4 plum tomatoes, and in the pantry was half a jar of couscous.  I bought some red snapper fillets on my way home from picking up the munchkin from school.  Throw it all together and what do you get?  A skillet of yumminess.

    Fish with Eggplant Ragout

    Ingredients:
    • 1 medium eggplant, diced into 1/2" pieces
    • salt
    • olive oil
    • 1/2 onion, chopped
    • 3 cloves garlic, chopped
    • 4 plum tomatoes, diced into 1/2" pieces
    • 1 small bell pepper, chopped
    • 1 package (6 oz.) sliced button mushrooms
    • 1/4 cup water
    • Tastefully Simple Seasoned Salt
    • large dash of dried thyme
    • large dash of dried oregano
    • 1 pound fish fillets, cut into 4 pieces
    Directions:
    • Liberally salt the eggplant pieces and let sit in a colander for 10 minutes to drain.  Rinse thoroughly.
    • In a large skillet, heat a couple tablespoons of olive oil on medium-high heat and sauté the onions until translucent.
    • Add the eggplant and everything else except the fish.  Season with TSSS to taste.  Sauté for about 10 minutes until veggies are soft.
    • Move veggies to the edge of the pan and add another tablespoon of olive oil to the center.
    • Season the fish fillets with TSSS.  Add the fish in a single layer to the center of the pan.  Cook for a few minutes on each side until done and flaky.  Spoon the veggie mixture over the fish, remove from heat and let sit for a minute.
    • Serve over couscous or rice.

    Monday, August 8, 2011

    Spinach Turkey Roll

    ETA on 8/9/14: To make this gluten-free, I replaced the 1 cup of bread crumbs with 1/4 cup coconut flour.  

    This was delicious, and the presentation was pretty impressive.  I used Jennie-O turkey, which comes in a 1.25-lb tray (as opposed to just 1 pound as the original recipe calls for).  I added parmesan and salt to the mixture for more flavor.  And I don't keep mustard powder in the pantry (though maybe I should), so I used regular Dijon mustard.  I also don't keep wax paper around, so I used aluminum foil to roll the meat mixture.

    Spinach Turkey Roll
    Taken from this recipe.


    Ingredients:
    • 1/4 cup marinara sauce
    • 2 eggs, lightly beaten
    • 1 cup whole wheat bread crumbs
    • 1/4 cup grated or shredded parmesan
    • 1/2 onion, minced
    • 2 cloves of garlic, minced
    • 1 teaspoon dried basil
    • 1 teaspoon dried oregano
    • 1 tablespoon Dijon mustard
    • 1 tray (1.25 pound) ground turkey
    • 1/4-ish teaspoon salt
    • 1 package (10 oz.) frozen chopped spinach, thawed and squeezed dry
    • 1/2 cup shredded mozzarella cheese
    • olive oil in a mister
    • another 1 cup marinara sauce for plating
    Directions:
    • Pre-heat oven to 350 degrees F.
    • In a large mixing bowl, combine the first 11 ingredients together.
    • On a large sheet of aluminum foil (or wax paper), spread the meat mixture out and shape into a large rectangle, a little larger than 12x8 inches, and approximately 1/2-inch thick.  Sprinkle with the spinach and cheese.
    • Position the short side of the meat rectangle towards you, and carefully roll up the meat like a jelly roll, peeling the foil away as you go.  Seal the ends and the seam and discard the foil.
    • Spray a baking sheet with cooking spray.  Transfer the turkey roll to the baking sheet, seam side down, and bake for 50 - 60 minutes until cooked through (internal temperature registers 165 degrees F).
    • When the roll is done, heat the remaining 1 cup of marinara sauce.  Slice the turkey roll into individual portions and top with the heated sauce.

      Saturday, August 6, 2011

      Fish Stew

      A quick, simple and delicious fish stew.  I made more broth than what the original recipe called for because I love dipping a warm, crusty sourdough loaf into it.  I also omitted the tomato paste and added more tomatoes, and next time I think I'll add even more.  Yum.  Eat more fish!

      Fish Stew
      Taken from this recipe.


      Ingredients:
      • a few tablespoons of olive oil
      • 1/2 a medium onion, chopped (about 1 cup)
      • 2 cloves of garlic, chopped
      • a small handful of fresh parsley, chopped (about 1 cup)
      • 4 plum tomatoes, chopped (about 2 cups)
      • 1 tablespoon tomato paste
      • 1 8-oz. bottle of clam juice
      • 1 cup dry white wine
      • 1 cup vegetable (or fish) broth
      • 1.5 pounds of sea bass (or other white fish), cubed into 1-inch pieces
      • a dash each of dry oregano, thyme and Tabasco
      • Tastefully Simple Seasoned Salt, to taste
      • freshly-ground black pepper, to taste
      • lemon wedges
      Directions:
      • In a large heavy pot, heat olive oil over medium-high heat. Add onion and garlic and sauté for a few minutes until soft and translucent.  
      • Add parsley, tomato and tomato paste and cook, stirring often, for a few minutes until tomatoes begin to soften.
      • Add clam juice, wine, vegetable broth and fish.  Bring to a boil, then reduce heat to medium-low and cover the pot.  Simmer 7-10 minutes until fish is cooked through.
      • Add TSSS and pepper to taste.
      • Ladle into bowls and spritz with lemon wedges.
      • Serve with fresh, hot, crusty bread.

      Thursday, August 4, 2011

      Chicken with Balsamic Vinegar

      Chicken with Balsamic Vinegar
      Adapted from this recipe.


      Ingredients:
      • 4 medium boneless, skinless chicken breasts (cut into strips or pounded flat, optional)
      • Tastefully Simple Seasoned Salt
      • freshly ground black pepper
      • juice of 1/2 lemon
      • 2 tablespoons of olive oil
      • 1/2 cup balsamic vinegar
      • 1/2 cup white wine
      • 2 cloves of garlic, minced
      • handful of cherry tomatoes, sliced in half
      • 2 tablespoons of Smart Balance
      Directions:
      • Season chicken with TSSS, pepper and lemon juice.
      • In a large skillet, heat olive oil on medium-high heat and cook the chicken until done and the juices run clear (7 - 10 minutes per side for breasts, 3-4 minutes per side for strips or tenders).  Remove chicken to a plate and tent with foil to keep warm.
      • Add balsamic vinegar, white wine, garlic and cherry tomatoes to the pan and deglaze it, scraping up all the browned chicken bits.  Cook for a few minutes to reduce the sauce by about half and until the tomatoes begin to soften.
      • Stir in and melt the butter.  Add the chicken back to the pan and flip to coat all sides.
      • Plate the chicken and pour all the yummy sauce over the top. 

      Tuesday, August 2, 2011

      Chicken Stuffed with Basil and Sun-Dried Tomatoes

      Boneless, skinless chicken breasts are a great lean protein and a staple in this kitchen.  But they can get old when you eat them over and over.  How can you spruce up boring old chicken breasts?  Stuff them!

      I've done Cordon Bleu-ish Chicken stuffed with ham and cheese, Chicken Stuffed with Feta and Sun-Dried Tomatoes, and Chicken Saltimbocca (can we say "prosciutto, YUM!"?).  Today I was admiring my beautiful little basil plant with its luscious green leaves, and I decided to use them to stuff tonight's chicken breasts.  Deee-lish!

      Chicken Stuffed with Basil and Sun-Dried Tomatoes


      Ingredients:
      • PAM
      • 4 medium chicken breasts, boneless and skinless, all visible fat removed
      • 4 teaspoons sun-dried tomatoes, drained (chopped, sliced or whole, it doesn't matter)
      • 8 - 12 fresh large basil leaves, washed and dried
      • Tastefully Simple Seasoned Salt
      Directions:
      • Preheat oven to 350 degrees F.  Spray a baking pan with PAM.
      • Butterfly the chicken breasts.  (Pound them out to 1/4" thickness if you desire.)
      • Open up the breasts and layer each one with a teaspoon of sun-dried tomatoes and 2 - 3 basil leaves. 
      • Close up the breasts and sprinkle both sides with TSSS.  
      • Tlace the stuffed breasts in the sprayed baking pan.
      • Bake until cooked through, approximately 25-30 minutes.

      Tuesday, July 19, 2011

      Portobello Cheese Steak Sandwich

      Some reviewers from the original recipe site say this tastes just like a traditional Philly Cheese Steak that's made from beef.  It does not.  To say that mushrooms taste like beef is ludicrous in my book.

      What it is, however, is a damn good mushroom sandwich.  Very tasty and satisfying.

      I used both red and green bell peppers only because a certain 3-year-old wandered into the kitchen while I was prepping, and somehow half of my red bell pepper slices disappeared.  I only had green left after that, so added some of that in.  Otherwise I would have stuck with all red, they're sweeter.  I also made it a tad saucier than the original recipe.

      I halved the recipe because it's just me and the hubs eating this tonight, and I don't think it would re-heat well.  If you had to pack up leftovers, I'd recommend dividing out the veggie mixture before placing the cheese on top, and then just adding and melting the cheese the next day when you are ready to eat it.

      Portobello Cheese Steak Sandwich
      Makes 2 sandwiches
      Taken from this recipe.


      Ingredients:
      • a teaspoon of olive oil
      • half an onion, sliced
      • 1 6-oz. package of portobellos, sliced
      • 1/2 red bell pepper, thinly sliced
      • 1 teaspoon dried oregano
      • a few turns of the black pepper grinder
      • 2 teaspoons whole wheat flour
      • 1/4 cup chicken broth
      • 1/2 tablespoon soy sauce
      • 2 slices of reduced-fat provolone
      • 2 whole wheat rosemary buns, split and toasted
      Directions:
      • Heat oil in a skillet over medium-high heat. Add onion and cook, stirring often, for 2 - 3 minutes until soft. 
      • Add mushrooms, bell pepper, oregano and black pepper and cook, stirring often, for about 5 minutes until the vegetables are wilted and soft.
      • Reduce heat to low; sprinkle the vegetables with flour and stir to coat. Stir for 30 seconds until the flour loses its raw taste.
      • Stir in broth and soy sauce and bring to a simmer. It will begin to thicken.
      • Remove from the heat and place the cheese slices on top of the vegetables.  Cover and let stand for a minute until the cheese is melted.
      • Divide the mixture in half and and onto each toasted bun.
      • Serve immediately.

      Tuesday, July 12, 2011

      Grilled Basil Lime Shrimp

      Grilled Basil Lime Shrimp


      Ingredients:
      • 1 pound large shrimp (25-30 count), peeled and de-veined
      • olive oil
      • 1 lime, halved
      • Tastefully Simple Seasoned Salt
      • Tastefully Simple Garlic Garlic
      • dried basil
      Directions:
      • In a bowl, combine the shrimp with a drizzle of olive oil, the juice of half a lime, a dash of TSSS, a few generous shakes of TSGG, and about a teaspoon of dried basil.  Cover and let marinate in the fridge for 15 - 30 minutes.
      • Soak 5 or 6 bamboo skewers in water.
      • Pre-heat grill to medium-high.  Skewer 4 to 5 shrimps onto each bamboo skewer and discard the marinade.  Grill for a few minutes on each side, until shrimps lose their translucency.  Spritz with the juice from the remaining half lime before serving.

      Friday, July 8, 2011

      Grilled Lemon Pepper Fish

      Lemon Pepper Chicken?  Sure.  Lemon Pepper Fish?  Why not.  I used my Lemon Pepper Chicken recipe on some fresh wild Sockeye salmon tonight and it was delish.  Try it, and eat more fish!

      Grilled Lemon Pepper Fish


      Ingredients:
      • 1 - 1.5 pounds of fish (I used a fresh wild Sockeye salmon fillet, skin on)
      • Tastefully Simple Seasoned Salt (to taste)
      • freshly ground black pepper (to taste)
      • 1 lemon (to taste)
      • olive oil
      Directions:
      • Place fish, skin side down, on a plate or cutting board.  Liberally season with TSSS and pepper.
      • Zest the lemon onto the fish.  Then cut the lemon and squeeze the juice onto the fish.
      • Drizzle with olive oil.
      • Cover with plastic wrap and let marinate in the fridge for about 15 minutes.
      • Pre-heat grill to medium-high heat.
      • Remove plastic wrap from fish and place skin side up on grill.  Cook, covered, for about 5 minutes.  Then flip the fish over to skin side down and cook, covered, for another 5 minutes until cooked through.  
      • Remove fish from grill and let rest for 5 minutes before serving.

      Saturday, July 2, 2011

      Grilled Salmon with Dijon Soy Marinade

      Ina calls this Asian Grilled Salmon, but I don't recall Dijon mustard ever being an Asian ingredient.  Or olive oil for that matter.  So I re-named it to Grilled Salmon with Dijon Soy Marinade.  But whatever you want to call it, you'll have to agree it's delicious.

      I cut back on the proportion of soy sauce because I found Ina's recipe to be a little too salty.  I also cut back a little on the amount of olive oil, because while it is a healthful ingredient, it's still a fat.  I only used a 1-pound sockeye filet (with skin on), so I reduced the marinade to 1/3 of the original recipe.  This was the perfect amount for two adults and a three-year-old-who-loves-fish.

      Grilled Salmon with Dijon Soy Marinade
      Taken from this recipe.


      Ingredients:
      • 1 lb. fresh wild sockeye salmon filet, de-boned, skin on
      • 1 tablespoon Dijon mustard
      • 1 tablespoon soy sauce
      • 1 tablespoon olive oil
      • 1/2 clove garlic, minced
       Directions:
      • Pre-heat grill on medium-high heat.
      • Place salmon skin side down on a cutting board and cut into 2 - 3 portions.
      • In a small bowl, whisk together the mustard, soy sauce, olive oil and garlic.
      • Drizzle marinade over salmon pieces and use a brush or spoon to evenly coat the fish.  NOTE: If you are planning on using the leftover marinade to top the salmon after grilling (optional), make sure you do not touch the dirty brush or spoon (with raw fish on it) to the marinade.
      • Let sit for 10 minutes.
      • Grill 5 minutes skin side up, then flip and grill for another 5 minutes skin side down.
      • Remove skin before serving.  If you'd like, drizzle the leftover marinade over the fish before serving.
      Eat more fish!

        Monday, June 27, 2011

        Grilled Buttermilk Chicken

        I love summer grilling.  Our previous grill died on us last summer, and we'd been putting off buying a new one.  I got me one of those stove-top grill pans, but it's just not the same thing.  So last month we bought a new grill and if you've noticed a decrease in my posts it's because of that.  I don't really have grill recipes.  I just take the steaks or chicken breasts or shrimp or whatever, sprinkle some TSSS and maybe some TSGG on it, rub it with some EVOO, and slap it on the grill.  Lots of flavor for minimal work.

        I was searching the Web a few weeks ago for new chicken recipes and came across this.  Grilled Buttermilk Chicken.  Having lived in the South (Alabama and Tennessee) for umpteen years, I'm very familiar with buttermilk FRIED chicken.  But grilled?  I was intrigued.

        The original recipe calls for bone-in, skin-on chicken pieces.  But of course that's a no-no on the South Beach Diet.  I used boneless, skinless chicken breasts, which I butterflied and cut through in half so I had thinner slices that would grill up more quickly.  It was perfect - flavorful, juicy and delicious.

        The only catch is that the buttermilk marinade does make the grill a little messy.  But oh so worth it.

        Grilled Buttermilk Chicken
        Taken from this recipe.


        Ingredients:
        • 1 - 1.5 cup lowfat buttermilk (enough to cover your chicken pieces)
        • 4 cloves of garlic, chopped (or 2 tablespoons Tastefully Simple Garlic Garlic)
        • 1 tablespoon paprika
        • Tastefully Simple Seasoned Salt
        • 4 boneless, skinless chicken breasts, butterflied and cut all the way through so you have 8 thinner pieces
        Directions:
        • In a bowl, combine the buttermilk, garlic, paprika and TSSS to taste.
        • Add the chicken pieces and toss to coat completely.
        • Cover the bowl tightly with plastic wrap and refrigerate overnight.
        • When ready to grill, pre-heat the grill to medium-high.  Grill the chicken for 7-10 minutes on each side, until cooked through.  Discard any remaining marinade.

        Tuesday, June 21, 2011

        Honey Soy Grilled Salmon

        This was so delish.  I bet the salmon would still be good with just the glaze (without the herb stuffing).  I bet the glaze would be good on chicken too.  Mmm mmm good!

        Honey Soy Grilled Salmon
        Taken directly from this recipe.


        Ingredients:
        • 1/4 cup packed cilantro leaves, finely chopped
        • 2 scallions, finely chopped
        • 2 teaspoons olive oil
        • 1 teaspoon freshly grated ginger
        • Tastefully Simple Seasoned Salt
        • 4 6-oz. center cut wild salmon filets with skin on
        • 2 teaspoons fresh lime juice
        • 2 teaspoons honey (use agave nectar to be completely SBD-legal)
        • 2 teaspoons soy sauce
        Directions:
        • Pre-heat grill to medium-high heat.
        • In a small bowl, combine cilantro, scallions, olive oil, ginger, and TSSS to taste.  Set aside.
        • On a cutting board, place the salmon filets skin-side down.  Using a sharp knife, cut a slit down the middle of each filet, lengthwise.
        • Divide the herb mixture and stuff into the slit of each salmon filet.
        • In a separate bowl mix the lime juice, honey and soy sauce.  Brush this glaze generously on top of each stuffed filet.
        • Grill the stuffed filets, skin-side up, for 3-4 minutes.  Turn the fish over (skin-side down), brush with glaze again, and grill an additional 3-4 minutes until it is cooked through.
        • Remove the skin (it will peel off very easily) and serve hot.

        Tuesday, June 14, 2011

        Chicken Veggie Alfredo

        I modified Ellie's recipe only because I don't like leaving half-opened cans of evaporated milk around.  Half a box of fettuccine, ok, but not half a can of milk.  Half a box (8 oz.) of fettuccine because it's easier for me to eyeball than the 12 oz. per Ellie's recipe.  That plus added veggies and beans makes plenty for our family of 2 adults and a toddler, with leftovers for lunch the next day.  I grilled the chicken because the weather was beautiful today and I wanted to play outside. I increased the amount of sauce because many reviewers recommended that about Ellie's recipe, and I doubled the veggies and added some beans.  The magical fruit, right?  ;-)  The results were scrumptious.

        Chicken Veggie Alfredo
        Adapted from this recipe.


        Ingredients:
        • 8 ounces (1/2 pound or 1/2 box) of whole wheat fettuccine
        • 4 boneless, skinless chicken breasts
        • Tastefully Simple Seasoned Salt
        • 2 tablespoons olive oil, divided
        • 2 cloves of garlic, minced and divided
        • 2 zucchini, thinly sliced into half-moons
        • 2 broccoli crowns, chopped into bite-size pieces and blanched
        • 2 tablespoons whole wheat flour
        • 1 cup cold fat free milk
        • 1 (12 oz.) can of fat free evaporated milk
        • 1 cup freshly-grated parmesan cheese
        • 1 (15 oz.) can of great northern beans, drained
        Directions:
        • Prepare the fettuccine per instructions on the box.  Drain, reserving some of the pasta water, and set aside.
        • Season both sides of chicken breasts with TSSS and grill until fully cooked.  Once cooled enough to handle, slice the cooked chicken and set aside.
        • In a large skillet, heat 1 tablespoon olive oil and sauté 1 minced clove of garlic with the zucchini and blanched broccoli for a few minutes until the zukes are soft and the broccoli is slightly firm.  Transfer veggies to a plate and set aside.
        • In a separate bowl, whisk together the flour, fat free milk and fat free evaporated milk.
        • Return the empty skillet to medium-high heat and add in the remaining 1 tablespoon of olive oil and 1 minced clove of garlic, stirring for 30 seconds until fragrant.
        • Add the flour-milk mixture to the skillet and bring to a boil, stirring often.  Reduce heat to low and simmer for a couple of minutes until the sauce begins to thicken.  Add the cheese and TSSS to taste and stir until the cheese is melted.
        • Toss in the sliced chicken, veggies, beans and cooked pasta.  Add some of the reserved pasta water to thin out the sauce as necessary.
        • Serve hot.

        Tuesday, June 7, 2011

        Garlic Shrimp and Chickpeas

        Garlic Shrimp and Chickpeas
        Taken from this recipe.


        Ingredients:
        • 2 15-oz. cans of chickpeas, drained and rinsed
        • 3 tablespoons of olive oil, divided
        • Tastefully Simple Seasoned Salt
        • 1 pound jumbo shrimp, peeled and de-veined
        • Tastefully Simple Garlic Garlic
        • 1 teaspoon grated lemon zest
        • juice of 1/2 lemon
        Directions:
        • Pre-heat oven to 450 degrees F.
        • Toss chickpeas with 1 tablespoon of olive oil and TSSS to taste.  Pour into a rectangular baking dish and bake for about 20 minutes until they are golden.
        • In the meantime, toss shrimp with the remaining 2 tablespoons of olive oil, TSSS, TSGG and lemon zest and let sit to marinate for at least 10 minutes.
        • After they have baked for 20 minutes, remove the dish of chickpeas from the oven and place the shrimp on top.  Return to the oven and continue baking for 8-10 minutes until shrimp are completely pink and cooked through.
        • Sprinkle with lemon juice before serving.

        Sunday, June 5, 2011

        Chicken and Mushrooms

        This is a spin on Paula Deen's Chicken Georgia recipe.  I really can't justify a half stick of butter going into anything (except maybe buttercream icing), so I replaced it with olive oil and Smart Balance.  I increased the amount of shallots and mushrooms because I love shrooms, and I added some white wine to create more sauce.  I also added a large pinch of thyme because I had it on hand.  YUM!

        Chicken and Mushrooms
        Adapted from this recipe.


        Ingredients:
        • a couple tablespoons of olive oil
        • 4 boneless, skinless chicken breasts
        • a couple tablespoons of Smart Balance
        • Tastefully Simple Seasoned Salt
        • Tastefully Simple Garlic Garlic
        • 2 medium shallots, minced
        • 1 10-oz. bag (approx. 2 cups) of sliced crimini mushrooms
        • large pinch of dried thyme
        • 1/2 cup white wine
        • 4 oz. freshly-grated part-skim mozzarella cheese
        Directions:
        • Heat a couple tablespoons of olive oil in a large skillet over medium-high heat.
        • Butterfly each chicken breast and cut straight through so you have 8 thinner pieces.  Season both sides of each piece with TSSS.  Place chicken in skillet and cook for a few minutes on each side until browned and cooked through.  Transfer to a plate and set aside.
        • Reduce heat to medium and add the Smart Balance to the skillet to melt it.
        • Add the shallots, shrooms, thyme and TSSS and TSGG to season.  Sauté until everything is cooked and soft.
        • Add the white wine to the skillet and deglaze, scraping up all the yummy brown bits at the bottom.  Move the mushrooms to the edges of the skillet and return the browned chicken to the center of the skillet.  Top the chicken with the shredded mozzarella.
        • Turn off the heat and cover the skillet.  Let sit for a minute until cheese is melted.
        • Plate the chicken, then pour the mushroom sauce mixture on top.

        Sunday, May 29, 2011

        Massaged Kale Salad

        Ok, as much as I love kale, I must admit I was quite apprehensive when my friend Dinah forwarded me this recipe.  Raw kale is YUCK.  Sautéed, great.  Baked into chips, great.  Boiled in soups and stews, great.  But until now, I would never have even entertained the idea of eating kale raw.

        But curiosity got the best of me, and I decided to make a batch of this today (with a baggie of arugula salad in the fridge on stand-by).  And so I take back all my negative preconceptions of raw kale.  This salad is ABSOLUTELY DELICIOUS.  Did I already say DELICIOUS?

        Even the hubs, who was a meat-and-potatoes guy when I met him 13 years ago, ate every single bite I put on his plate.  So thank you, thank you Dinah.

        The only changes I made to the original recipe were to 1. omit the cayenne because I don't like spicy, and 2. added a little bit of shaved parmesan because, well, I love cheese.  Oh, and I toasted the pine nuts first.

        Massaged Kale Salad
        Taken from this recipe.


        Ingredients:
        • 1 large handful of pine nuts
        • 1 large bunch of kale
        • 1 tablespoon extra virgin olive oil
        • juice of 1 lemon
        • 1/2 teaspoon Kosher salt
        • 1 avocado, diced
        • 1 clove of garlic, minced
        • several turns of the black pepper grinder
        • freshly-shaved parmesan
        Directions:
        • Spread the pine nuts on a small baking sheet and toast in the toaster oven for a couple of minutes until it begins to turn light brown.  Remove and set aside.
        • Wash and spin-dry the kale, remove the thick middle stem, and chop or tear the leaves into bite-size pieces.
        • Place kale, olive oil, lemon juice and salt into a large bowl.  Massage the kale with your hands for a minute until it becomes soft.
        • Add avocado, garlic, pepper and pine nuts and toss.
        • Top with some freshly-shaved parmesan.
        I know pine nuts are very pricey, but I had to try them today per the original recipe.  I'm thinking this salad would be just as yummy with walnuts instead of pine nuts.  Especially since walnuts are 1/4th the price of pine nuts.  ;-)

        Thursday, May 19, 2011

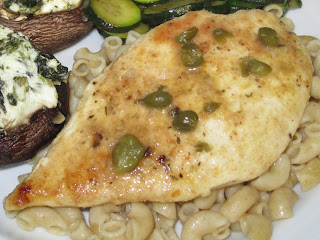
        Chicken Piccata

        Chicken Piccata
        Taken from this recipe (minus the parsley b/c I don't have any on hand).


        Ingredients:
        • 2 boneless skinless chicken breasts, butterflied and cut through so you have 4 thinner pieces
        • Tastefully Simple Seasoned Salt
        • freshly-ground black pepper
        • a few tablespoons of whole wheat flour 
        • a tablespoon of Smart Balance
        • a tablespoon of olive oil
        • zest of 1/2 lemon
        • juice of 1 large lemon
        • pinch of dried thyme
        • 1/2 cup chicken stock
        • 1/4 cup capers, drained
        Directions:
        • Season both sides of chicken breast pieces with TSSS and black pepper and dredge in flour.
        • In a skillet, heat Smart Balance and olive oil until melted.  Cook chicken for a few minutes on each side until browned.  Transfer chicken to a plate and set aside.
        • Zest 1/2 the lemon.  Add the lemon zest, lemon juice, thyme, chicken stock and capers to the pan and scrape up all the brown chicken bits.  Bring to a boil and add more seasoning as necessary.
        • Return the chicken to the pan and turn to coat with sauce.  Simmer for 5 minutes until chicken is cooked through.
        • Transfer chicken to a serving plate and pour the sauce on top.
        • Serve hot.

        Monday, May 16, 2011

        Creamy Chicken Taquitos

        ETA on 4/30/15: Wow, looking back on the recipe, I've changed a lot over the past 4 years. I no longer use reduced-fat anything, and I no longer use Tastefully Simple products. Now it's all organic whole cheeses/dairy and Pink Himalayan Sea Salt.

        These are so so so so good! I made the following modifications from the original recipe:

        I couldn't find 6" whole wheat tortillas. The only whole wheat tortillas I found were either 8" or 10", so I bought the 8" ones. I also rolled them a little thicker than a typical taquito, only because I count my grain servings and didn't want too high of a grain-to-filling ratio. This recipe made 6 large taquitos, which I served cut in half on a diagonal.

        I didn't have cilantro or scallions. And I used 4oz. reduced-fat cream cheese instead of 3oz, because a package is 8oz. and it was easier for me to eyeball 1/2 a brick as opposed to 3/8ths of a brick. Also, we don't normally use or keep cream cheese around, so I can make a second batch later this week and not have leftover cream cheese lying around for goodness knows how long.

        I used the juice of an entire lime instead of measuring out 1 tablespoon (again, so I wouldn't have anything partial to put back into the fridge). The lime juice is key, it lends a fantastic zing to the taquitos. And I used medium salsa for a nice but not overpowering kick.

        Creamy Chicken Taquitos
        Adapted from this recipe.


        Ingredients:
        • 1 pound boneless skinless chicken breasts or tenders
        • cooking spray
        • Tastefully Simple Seasoned Salt
        • 4 oz. reduced-fat cream cheese, softened
        • 1/4 cup salsa
        • juice of 1 lime
        • 1 teaspoon chili powder
        • 1/2 teaspoon cumin
        • 1 teaspoon Tastefully Simple Onion Onion
        • 1 teaspoon Tastefully Simple Garlic Garlic
        • 1 cup shredded reduced-fat sharp cheddar
        • 6 8-inch whole wheat tortillas
        • Kosher salt
        Directions:
        • Pre-heat oven to 350 degrees F.  Lightly spray a baking sheet with cooking spray.  Place chicken in a single layer onto the sheet, spray with cooking spray, and sprinkle with TSSS.  Bake for 15 - 17 minutes (for breasts) or 10 - 12 minutes (for tenders) until fully cooked.  Shred the cooked chicken as soon as it's cool enough to handle.  
        • Pre-heat oven to 425 degrees F.  Lightly spray a clean baking sheet with cooking spray.
        • In a large bowl, mix together the chicken with the rest of the ingredients except for the tortillas and Kosher salt.
        • Lay a tortilla onto a work surface and spoon onto it a few tablespoons of the chicken mixture.  Roll tightly, then place seam-side down onto the sprayed baking sheet.  Repeat with the rest of the tortillas and chicken mixture.
        • Spray the tops lightly with cooking spray and sprinkle with Kosher salt.
        • Bake for 15 - 20 minutes until crispy and golden brown.

          Friday, May 13, 2011

          Chicken Cacciatore

          Chicken Cacciatore
          Taken from this recipe.


          Ingredients:
          • 6 boneless skinless chicken breasts, butterflied and cut through so you have 12 thinner pieces
          • Tastefully Simple Seasoned Salt
          • freshly-ground pepper
          • whole wheat flour
          • olive oil
          • 1 red bell pepper, cored, seeded and chopped
          • 1 medium onion, chopped
          • 3 garlic cloves, minced
          • 2 15-oz. cans of dice tomatoes
          • 1 cup chicken broth
          • 3 tablespoons drained capers
          • 1.5 teaspoons dried oregano
          • 1.5 teaspoons dried basil
          Directions:
          • Season chicken with TSSS and pepper, then dredge in flour, shaking off any excess.
          • Sauté the chicken on both sides in a large pan with a couple tablespoons of olive oil.  Do in two batches if necessary.  When chicken is nicely browned on both sides, transfer to a plate and set aside.
          • Add bell pepper, onion and garlic to the pan and sauté over medium heat for a few minutes until tender.
          • Add the two cans of diced tomatoes, the chicken broth, capers, oregano and basil.  Stir to combine.
          • Return the chicken to the pan and nestle them into the sauce.  Simmer on medium-low for 10 - 15 minutes, until the chicken is cooked through.
          • Serve hot over whole wheat pasta.

          Tuesday, May 10, 2011

          Oatmeal Raisin Cookie Granola

          I find commercially-packaged granolas way too sweet, so I end up making my own.  Granola is really easy to make, and very versatile, you can add whatever fruits and nuts you like to it.  Use Splenda and agave nectar in place of the sugar and honey to make it SBD-friendly.

          I have been craving oatmeal raisin cookies all week, so I came up with this.  All the flavors of an oatmeal cookie in a crunchy granola.

          Oatmeal Raisin Cookie Granola


          Ingredients:
          • 4 cups rolled oats
          • 1/4 cup brown sugar
          • 1/2 teaspoon salt
          • 2 teaspoons cinnamon
          • 1 cup chopped walnuts
          • 2 teaspoons vanilla
          • 1/2 cup melted coconut oil
          • 1/2 cup honey
          • 1 cup raisins
          Directions:
          • Pre-heat oven to 325 degrees F.
          • In a large bowl, mix the first 5 ingredients together (the dry).
          • In a separate bowl, mix the next 3 ingredients together (the wet).
          • Pour the wet into the dry and combine well.
          • Line a baking sheet with a Silpat.
          • Spread the granola mixture over the Silpat.
          • Bake for 30 - 45 minutes until lightly browned, stirring a couple times to ensure even browning.  Sprinkle the raisins onto the mixture towards the last 5 minutes of baking.
          • Remove from oven and let cool completely.  The granola will be soft while it's hot, but once it cools completely it will be nice and crunchy.
          • Store in an airtight container.